The DigiView software is project oriented in order to save and restore specific settings such as Analyzer Model, Signal Definitions, Search Definitions, Trigger Configurations, Window placement, Capture History and so forth.
When launching the software, the Project Selections window will open first so you can create a new project, open an existing project or load an example project that includes captured data.
Project Selections

The Project Selections Window can be opened at any time using the "Open Project Selections" button from the main tool bar or by selecting Menu-> Project-> Project Selections. It will also open automatically when the software first launches.
For Details see Project Selections.
Starting with a new Project
If you want to create a new blank project, then select "New Project" from the Project Selections Window.
For Details see Creating a New Project.
Saving a Project

To save a project, select the "Save Project" button from the main tool bar or select Menu-> Project-> Save Project. When a project is saved, the capture being view will be embedded into the project file so it can be viewed the next time the project is opened, even if you manually delete the history folder or move the project file to a different location. This also makes it simple to share the project with a colleague since the history files and folder are not required to view the capture.
Auto Save/Restore
The "Auto Save" and "Restore last Project" options are found in the Environment settings. When both of these options are enabled, DigiView auto-saves the current data, settings and state of the project when you exit the program (or load a different project) and auto-loads the last opened project when you start the program. This allows you to pick-up where you left-off the next time you start the software without having to save/restore. You can still save the project manually anytime you need by selecting the "Save Project" button on the main tool bar.
See Also: Environment settings
Saving the Project with a new name or to a different directory
To save a project to a new location or with a different name, select Menu-> Project-> Save Project As. When saving this way, the entire Capture History can be copied to the new location and/or name as well.
See Also: Capture History.
The Save Project As function will prompt you for a new name and location by opening a system folder window. After making your selections, the DigiView software will ask permission to make a copy of the capture history for the new project.
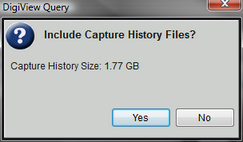
If you select yes when prompted, the entire capture history for the current project will be copied to the new project's location and name. Since the Capture History is stored in a sub-folder using the project's name, it is safe to create projects in the same directory. The "Copy History" prompt also displays the amount of disk space being used by the history files and will copy as many files as free space allows, leaving a safety margin.
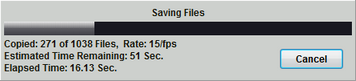
The most recent captures are copied first (and kept in chronological order) in case you do not have enough space available or if you decide to cancel before the entire history is copied.
Cloning a Project for a New Analyzer
You may wish to open a Project configured for a different Analyzer model than the one currently attached to your PC and then want to capture new data with the new analyzer model without having to recreate the project and all its settings. To do this, you can can clone the project by selecting Menu-> Project-> Clone Settings...
For Details see Cloning Projects.